If you’re using one of the Ribbon versions of Microsoft Outlook, you’ve probably overlooked one feature right on the Home tab: Quick Steps. Quick Steps are like macros — they string together several actions and make them all accessible with one click. The pre-installed Quick Steps only hint at the feature’s time-saving potential. Here are five ways to deploy Quick Steps today to manage your email better.
Unless otherwise noted, all instructions and screenshots are for Microsoft Office 2010 for Windows.
1. Pre-configured emails. Communicating with some recipients isn’t as easy as opening up a new email, popping in an email address (careful with that AutoComplete!) and typing a message. Some of them (e.g., insurance companies) require certain information in the subject line or body of every email (like a claim number), or require you to copy additional recipients. You could dread communicating with these people, or you could set up a Quick Step that fills all this information into a brand-new, ready-to-go email.
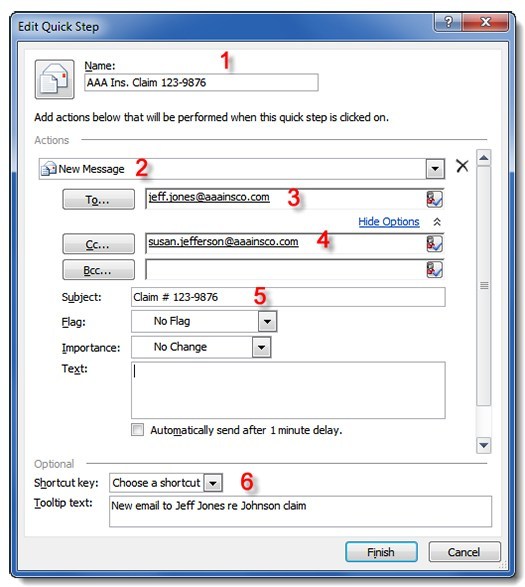
Just click Create New in the Quick Steps area of the Home tab, name your new Quick Step (step 1 in the screenshot below) then choose New Email (step 2). Address the email (steps 3 and 4), type in your Subject line and any standard text you need (step 5), and, if you prefer keyboard shortcuts rather than mouse clicks, choose an optional shortcut key (step 6):
Next time you send that claims rep an email, you don’t have to look up the claim number or the cc: information. Just click the shortcut key you have selected once and start typing!…
Click here to read more